Each week we head to the library! The girls have to check out 1 large book and then they can pick however many "easy books" they want. The library also runs a summer reading program so the girls are reading and doing 1 paragraph summaries to earn tickets to win a bike.
With all the library books coming and going from our house we needed a way to carry them all as well as a safe place to keep the books in the house!
Enter: Our library book tote bags!
Freezer paper is crazy easy to work with! You can do this project without an eClips or other die cutting machine, you would just need to cut your stencil with an excto knife.
You need:
Freezer paper, you can find this at your local grocery store, around 3 bucks for hundreds of feet!
Canvas bags (8.99 for 3 at Joann's)
Fabric Paint, 1.99 at Joann's each
Paint brushes
Iron and Ironing board.
I own an eClips, its amazing! It comes with a program that allows me to create anything I want on my computer and then cut it out.
I created the stencil for each bag on my computer.
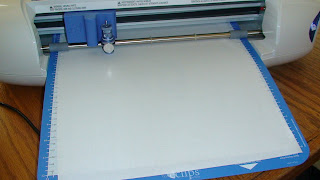
Then I loaded freezer paper into the machine on the sticky mat and in the words of Dave Coulier "Cut It Out!"
 I totally forgot to take a picture of me ironing .. maybe because I was ironing. But you place the freezer paper SHINY side DOWN! You iron it on and it magically sticks! And if you get it wrong, you can peel it up and iron it down again! Its really hard to mess up this project.
 You want to put something inside whatever you are painting. I used the front of cereal boxes. It will stop the paint from soaking through.
Now its time to paint! I used those cheap foam brushes (catch them on sale 20 for 1.00!) You want to dab on the paint, or at least brush from the stencil inward, don't push the paint towards the paper edge, it will cause the paint to seep under the stencil and your lines wont be crisp.
Once you are done painting, remove the freezer paper right away, DO NOT let it dry! It will be very hard to peel off and you also run the risk of peeling off paint. So, still wet, peel it off. Careful not to let the painted on stencil touch your fabric as your peel. The peeling is my favorite part .. instant gratification!
Allow to dry for 24 hours, but they really are dry in just a few hours. If you use fabric paint they are fully washable and usable the next day. This project is pretty easy, with my help M1 and A2 made their own bags, the one I made will hold books for the little ones B3, A4 and M5.
 I already owned the freezer paper, paint brushes and black paint. I got the pink, gray, teal and brown paint on sale 25% off and used a 40% off coupon on the tote bags. This whole project cost $11.69. I saved $5.40 with coupons and sales!!
 I am linking up to these parties:


Cute project. Thanks so much for linking up to our Pretty Things Party! I hope you'll be back next week!
ReplyDeletegreat tutorial. I plan to do some book bags for a book baby shower, so your tutorial will come in handy.
ReplyDeleteThanks for taking the time to write it up and share.